安装
安装环境
CPU
CPU(中央处理器)要求取决于用户数量和预期工作负载求。您的具体需可能更多,具体取决于您的工作量。您的工作负载受到多种因素的影响,例如但不限于您的用户活跃程度、您使用的自动化程度、镜像以及存储库/更改大小。
以下是针对少数 GitLab 用户群规模示例的建议最低 CPU 硬件指南:
- 4 核 是建议的最小核心数,最多支持
500个用户 - 8 核 支持多达
1000个用户 - 更多用户,请参阅 参考架构页面
RAM
RAM(内存)要求取决于用户数量和预期工作负载。您的具体需求可能更多,具体取决于您的工作量。您的工作负载受到多种因素的影响,例如但不限于您的用户活跃程度、您使用的自动化程度、镜像以及存储库/更改大小。
以下是针对少数 GitLab 用户群大小示例的建议最低内存硬件指南:
- 4 GB 是所需的最小内存大小,最多支持
500个用户 - 8 GB 支持多达
1000个用户 - 更多用户,请参阅 参考架构页面
Linux 安装
分别在 Debian/Ubuntu-18.04 和 RedHat/CentOS-Stream-8 系统中安装。
安装和配置所需的依赖。
Debian/Ubuntu 系统
sudo apt install -y curl openssh-server ca-certificates tzdata perl postfixRedHat/CentOS 系统
sudo yum install -y curl policycoreutils-python3 openssh-server perl postfix
GitLab EE
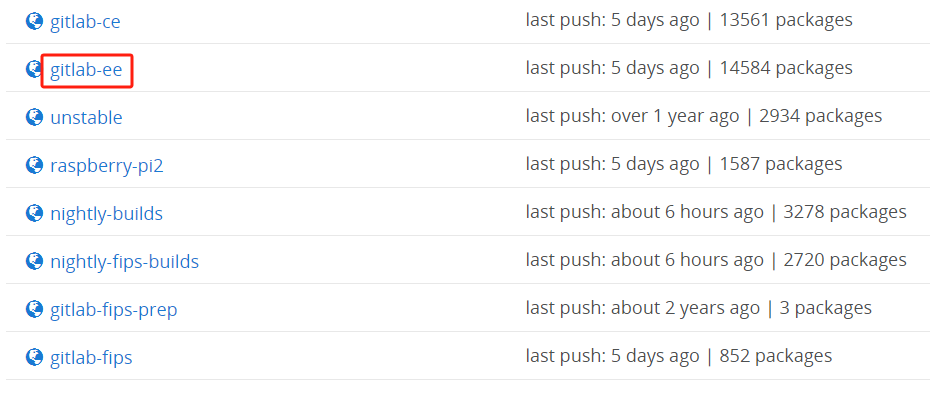
访问 GitLab 包仓库,选择需要安装的 GitLab 版本。
使用 Bash 脚本安装 GPG 密钥、GitLab 存储库等,选择支持您系统的脚本。
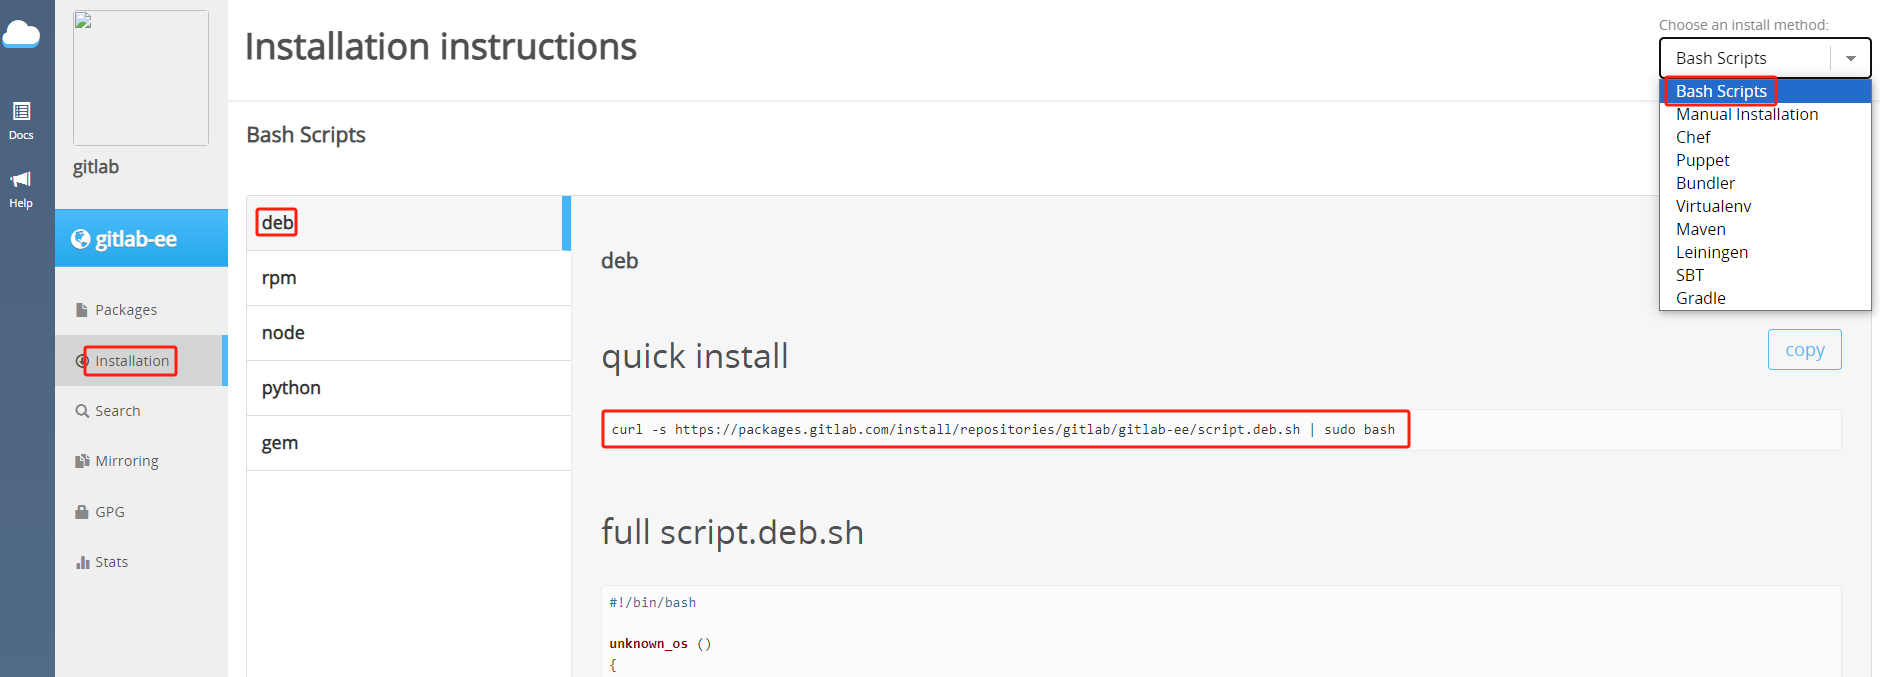
Debian/Ubuntu 系统
curl -s https://packages.gitlab.com/install/repositories/gitlab/gitlab-ee/script.deb.sh | sudo bashRedHat/CentOS 系统
curl -s https://packages.gitlab.com/install/repositories/gitlab/gitlab-ee/script.rpm.sh | sudo bash
接下来安装 gitlab-ee。此外,还需要通过设置 EXTERNAL_URL 环境变量来指定 GitLab EE 实例的 URL。如果还要设置初始密码,查看下一步骤。
EXTERNAL_URL
EXTERNAL_URL 可以使用完全限定域名(FQDN),也可以使用服务器 IP 地址。
如果 有域名 则设置域名(例如:http://gitlab.example.com);如果 没有域名 则设置本地 IP 地址(例如:http://localhost),还可以指定端口(例如:http://localhost:port)GitLab 默认使用 80 端口。
注意
注意您使用的端口是否和 GitLab 中其他服务默认端口冲突,GitLab 默认会运行很多与 GitLab 相关的其他服务或工具。
Debian/Ubuntu 系统
sudo EXTERNAL_URL="http://localhost" apt install -y gitlab-eeRedHat/CentOS 系统
sudo EXTERNAL_URL="http://localhost" yum install -y gitlab-ee
设置初始密码(引入于 GitLab 14.0),默认情况下,Linux 软件包安装会自动为初始管理员用户账号(root)生成密码,并将其存储到 /etc/gitlab/initial_root_password 至少 24 小时。出于安全原因,24 小时后,此文件会被第一次 gitlab-ctl reconfigure 自动删除。
提示
如果 GitLab 在安装期间无法检测到服务器的有效主机名,则不会运行重新配置。
要提供自定义初始 root 密码,有以下两种方式:
如果服务器的主机名设置正确,则将
GITLAB_ROOT_PASSWORD环境变量传递给安装命令Debian/Ubuntu 系统
sudo GITLAB_ROOT_PASSWORD="<strongpassword>" EXTERNAL_URL="http://localhost" apt install -y gitlab-eeRedHat/CentOS 系统
sudo GITLAB_ROOT_PASSWORD="<strongpassword>" EXTERNAL_URL="http://localhost" yum install -y gitlab-ee
如果在安装期间 GitLab 没有自动执行重新配置,则必须将
GITLAB_ROOT_PASSWORD变量传递给第一次运行的gitlab-ctl reconfigure。在第一次重新配置之前,编辑
/etc/gitlab/gitlab.rb(如果不存在则创建)并设置:gitlab_rails['initial_root_password'] = '<my_strong_password>'
这两种方法都仅适用于初始数据库播种设定,发生在第一次重新配置期间。对于后续的重新配置运行,上述方法均无效,在这种情况下,使用 /etc/gitlab/initial_root_password 中的随机密码登录,或重置 root 密码。
出现以下提示说明 GitLab 安装成功:
It looks like GitLab has not been configured yet; skipping the upgrade script.

       *.                  *.
      ***                 ***
     *****               *****
    .******             *******
    ********            ********
   ,,,,,,,,,***********,,,,,,,,,
  ,,,,,,,,,,,*********,,,,,,,,,,,
  .,,,,,,,,,,,*******,,,,,,,,,,,,
      ,,,,,,,,,*****,,,,,,,,,.
         ,,,,,,,****,,,,,,
            .,,,***,,,,
                ,*,.


     _______ __  __          __
    / ____(_) /_/ /   ____ _/ /_
   / / __/ / __/ /   / __ `/ __ \
  / /_/ / / /_/ /___/ /_/ / /_/ /
  \____/_/\__/_____/\__,_/_.___/


Thank you for installing GitLab!
GitLab was unable to detect a valid hostname for your instance.
Please configure a URL for your GitLab instance by setting `external_url`
configuration in /etc/gitlab/gitlab.rb file.
Then, you can start your GitLab instance by running the following command:
  sudo gitlab-ctl reconfigure

For a comprehensive list of configuration options please see the Omnibus GitLab readme
https://gitlab.com/gitlab-org/omnibus-gitlab/blob/master/README.md

Help us improve the installation experience, let us know how we did with a 1 minute survey:
https://gitlab.fra1.qualtrics.com/jfe/form/SV_6kVqZANThUQ1bZb?installation=omnibus&release=16-11
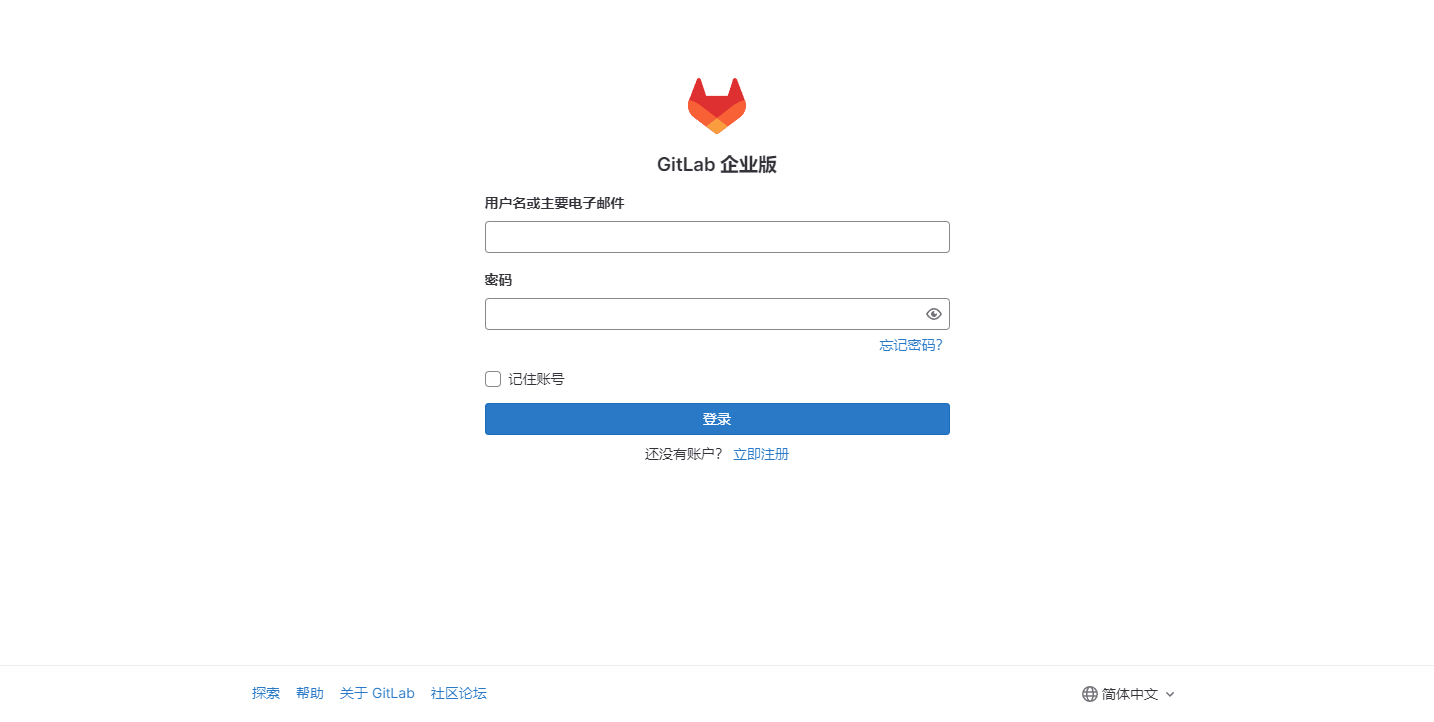
访问 GitLab 服务 http://localhost:port。如果在安装过程中指定了初始密码,则用初始密码登录,如果未指定密码,则系统会随机生成一个密码并存储在 /etc/gitlab/initial_root_password 文件中,查看随机密码并使用 root 用户名登录。
提示
出于安全原因,24 小时后,/etc/gitlab/initial_root_password 会被第一次 gitlab-ctl reconfigure 自动删除,因此若使用随机密码登录,建议安装成功初始登录成功之后,立即修改初始密码。
sudo cat /etc/gitlab/initial_root_password
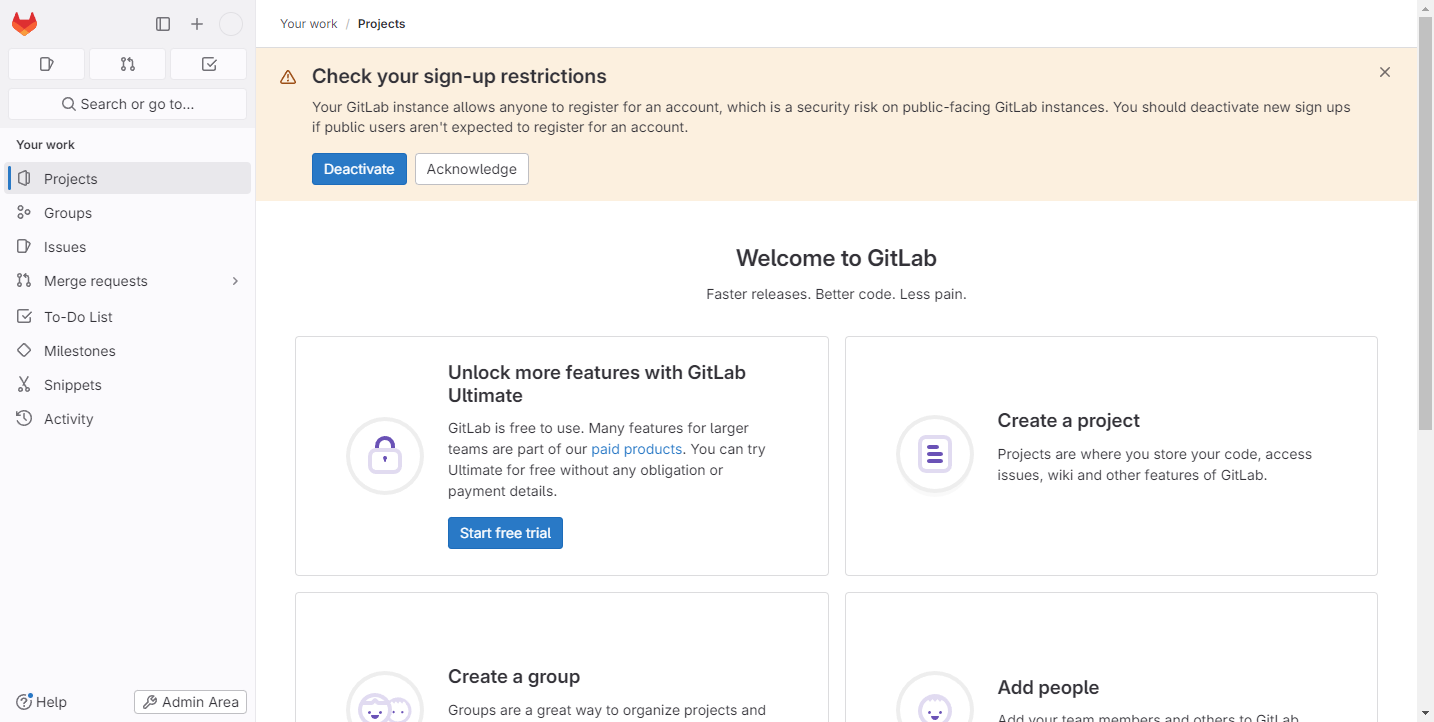
GitLab EE 主页。
极狐GitLab
执行以下命令配置 极狐GitLab 软件源镜像:
curl -fsSL https://get.gitlab.cn | /bin/bash
接下来安装 极狐GitLab。此外,还需要通过设置 EXTERNAL_URL 环境变量来指定 极狐GitLab 实例的 URL。如果还要设置初始密码,查看下一步骤。
EXTERNAL_URL
EXTERNAL_URL 可以使用完全限定域名(FQDN),也可以使用服务器 IP 地址。
如果 有域名 则设置域名(例如:http://gitlab.example.com);如果 没有域名 则设置本地 IP 地址(例如:http://localhost),还可以指定端口(例如:http://localhost:port)GitLab 默认使用 80 端口。
注意
注意您使用的端口是否和 GitLab 中其他服务默认端口冲突,GitLab 默认会运行很多与 GitLab 相关的其他服务或工具。
Debian/Ubuntu 系统
sudo EXTERNAL_URL="http://localhost" apt install -y gitlab-jhRedHat/CentOS 系统
sudo EXTERNAL_URL="http://localhost" yum install -y gitlab-jh
设置初始密码(引入于 极狐GitLab 14.0),默认情况下,Linux 软件包安装会自动为初始管理员用户账号(root)生成密码,并将其存储到 /etc/gitlab/initial_root_password 至少 24 小时。出于安全原因,24 小时后,此文件会被第一次 gitlab-ctl reconfigure 自动删除。
提示
如果 极狐GitLab 在安装期间无法检测到服务器的有效主机名,则不会运行重新配置。
要提供自定义初始 root 密码,您有两个选择:
如果服务器的主机名设置正确,则将
GITLAB_ROOT_PASSWORD环境变量传递给安装命令Debian/Ubuntu 系统
sudo GITLAB_ROOT_PASSWORD="<strongpassword>" EXTERNAL_URL="http://localhost" apt install -y gitlab-jhRedHat/CentOS 系统
sudo GITLAB_ROOT_PASSWORD="<strongpassword>" EXTERNAL_URL="http://localhost" yum install -y gitlab-jh
如果在安装期间 GitLab 没有自动执行重新配置,则必须将
GITLAB_ROOT_PASSWORD变量传递给第一次运行的gitlab-ctl reconfigure。在第一次重新配置之前,编辑
/etc/gitlab/gitlab.rb(如果不存在则创建)并设置:gitlab_rails['initial_root_password'] = '<my_strong_password>'
这两种方法都仅适用于初始数据库播种设定,发生在第一次重新配置期间。对于后续的重新配置运行,上述方法均无效。在这种情况下,使用 /etc/gitlab/initial_root_password 中的随机密码登录,或重置 root 密码。
出现以下提示说明 极狐GitLab 安装成功:
Running handlers:
[2024-04-24T15:50:19+08:00] INFO: Running report handlers
Running handlers complete
[2024-04-24T15:50:19+08:00] INFO: Report handlers complete
Infra Phase complete, 557/1635 resources updated in 06 minutes 23 seconds

Notes:
Default admin account has been configured with following details:
Username: root
Password: You didn't opt-in to print initial root password to STDOUT.

NOTE: Because these credentials might be present in your log files in plain text, it is highly recommended to reset the password following https://docs.gitlab.com/ee/security/reset_user_password.html#reset-your-root-password.

gitlab Reconfigured!

                  *.                  *.
                 ***                 ***
                *****               *****
               .******             *******
               ********            ********
              ,,,,,,,,,***********,,,,,,,,,
             ,,,,,,,,,,,*********,,,,,,,,,,,
             .,,,,,,,,,,,*******,,,,,,,,,,,,
                 ,,,,,,,,,*****,,,,,,,,,.
                    ,,,,,,,****,,,,,,
                       .,,,***,,,,
                           ,*,.


         ___ __  __         _______ __  __          __
        / (_) / / /_  __   / ____(_) /_/ /   ____ _/ /_
   __  / / / /_/ / / / /  / / __/ / __/ /   / __ `/ __ \
  / /_/ / / __  / /_/ /  / /_/ / / /_/ /___/ /_/ / /_/ /
  \____/_/_/ /_/\__,_/   \____/_/\__/_____/\__,_/_.___/


Thank you for installing JiHu GitLab!
GitLab should be available at http://10.1.1.10:8088

For a comprehensive list of configuration options please see the Omnibus GitLab readme
https://jihulab.com/gitlab-cn/omnibus-gitlab/-/blob/main-jh/README.md

Help us improve the installation experience, let us know how we did with a 1 minute survey:
https://wj.qq.com/s2/10068464/dc66


  Verifying        : gitlab-jh-16.11.0-jh.0.el8.x86_64                              1/1

Installed:
  gitlab-jh-16.11.0-jh.0.el8.x86_64

Complete!
访问 极狐GitLab 服务 http://localhost:port。如果在安装过程中指定了初始密码,则用初始密码登录,如果未指定密码,则系统会随机生成一个密码并存储在 /etc/gitlab/initial_root_password 文件中,查看随机密码并使用 root 用户名登录。
提示
出于安全原因,24 小时后,/etc/gitlab/initial_root_password 会被第一次 gitlab-ctl reconfigure 自动删除,因此若使用随机密码登录,建议安装成功初始登录成功之后,立即修改初始密码。
sudo cat /etc/gitlab/initial_root_password
极狐GitLab 主页。
控制 GitLab 服务
使用 gitlab-ctl 常用命令如下:
| 命令 | 描述 |
|---|---|
sudo gitlab-ctl --help | 获取 gitlab-ctl 命令帮助 |
sudo gitlab-ctl start | 启动服务 |
sudo gitlab-ctl stop | 停止服务 |
sudo gitlab-ctl restart | 重启服务 |
sudo gitlab-ctl status | 显示所有服务状态 |
sudo gitlab-ctl reconfigure | 更新配置(修改配置后执行) |
sudo gitlab-ctl remove-accounts | 删除此包使用的所有用户和组 |
sudo gitlab-ctl uninstall | 卸载 gitlab 但会保留您的数据(代码库、数据库、配置) |
sudo gitlab-ctl cleanse | 卸载 gitlab 删除所有数据 |
使用 systemd 控制 GitLab 服务命令:
| 命令 | 描述 |
|---|---|
sudo systemctl start gitlab-runsvdir.service | 启动服务 |
sudo systemctl stop gitlab-runsvdir.service | 停止服务 |
sudo systemctl restart gitlab-runsvdir.service | 重启服务 |
sudo systemctl status gitlab-runsvdir.service | 显示所有服务状态 |
sudo systemctl enable gitlab-runsvdir.service | 开机自启 |
sudo systemctl disable gitlab-runsvdir.service | 禁止开机自启 |
Docker 安装
GitLab Docker 镜像是 GitLab 的整体镜像,在单个容器中运行所有必要的服务。
Docker 映像不包含邮件传输代理(MTA)。推荐的解决方案是添加在单独容器中运行的 MTA(例如:Postfix 或 Sendmail)。作为另一种选择,您可以直接在 GitLab 容器中安装 MTA,但这会增加维护开销,因为您可能需要在每次升级或重新启动后重新安装 MTA。
配置 SSH 端口
GitLab 使用 SSH 通过 SSH 与 Git 进行交互。默认情况下,GitLab 使用端口 22。
要在使用 GitLab Docker 映像时使用不同的端口,使用以下两种方式:
更改服务器的 SSH 端口(推荐)
在这种情况下,SSH 克隆 URL 看起来像
ssh://git@gitlab.example.com/user/project.git。使用编辑器打开
/etc/ssh/sshd_config,然后更改 SSH 端口:Port = 2424保存文件并重新启动 SSH 服务:
sudo systemctl restart sshd.service打开新的终端会话并验证您是否可以使用新端口通过 SSH 连接到服务器。
更改 GitLab Shell SSH 端口
在这种情况下,SSH 克隆 URL 看起来像
ssh://git@gitlab.example.com:<portNumber>/user/project.git。docker run时,在GITLAB_OMNIBUS_CONFIG变量中添加gitlab_rails['gitlab_shell_ssh_port'] = 2424,多个参数用 ; (冒号)分割,并且修改publish映射端口。
配置挂载卷
创建挂载目录 /opt/gitlab。
sudo mkdir /opt/gitlab
配置一个新的环境变量 $GITLAB_HOME,指向配置、日志和数据文件所在的目录。将 $GITLAB_HOME 环境变量应该附加到您的 shell 的配置文件(~/.bash_profile)中,以便它应用于所有未来的终端会话。
在 ~/.bash_profile 文件最后添加以下内容:
export GITLAB_HOME=/opt/gitlab
执行 ~/.bash_profile 文件,使配置立即生效:
source ~/.bash_profile
GitLab 容器使用主机安装的卷来存储持久数据:
| 本地位置 | 容器位置 | 用法 |
|---|---|---|
$GITLAB_HOME/data | /var/opt/gitlab | 用于存储应用程序数据 |
$GITLAB_HOME/logs | /var/log/gitlab | 用于存储日志 |
$GITLAB_HOME/config | /etc/gitlab | 用于存储 GitLab 配置文件 |
GitLab EE
使用 Docker Engine 安装 GitLab
其中
<version>是 GitLab 版本(例如:16.5.3),它总是包括<major>.<minor>.<patch>以其名称命名。external_url根据您的情况配置。出于测试目的,您可以使用
latest标签(例如:gitlab/gitlab-ee:latest),它指向最新的稳定版本。sudo docker run --detach \ --hostname gitlab.example.com \ --env GITLAB_OMNIBUS_CONFIG="external_url 'http://gitlab.example.com'; gitlab_rails['time_zone'] = 'Asia/Shanghai'" \ --publish 443:443 --publish 80:80 --publish 22:22 \ --name gitlab \ --restart always \ --volume $GITLAB_HOME/config:/etc/gitlab \ --volume $GITLAB_HOME/logs:/var/log/gitlab \ --volume $GITLAB_HOME/data:/var/opt/gitlab \ --shm-size 256m \ gitlab/gitlab-ee:<version>-ee.0使用 Docker Compose 安装 GitLab
在
docker-compose.yml文件中使用环境变量来定义卷的路径。创建.env文件,在.env文件中定义GITLAB_HOME变量,以在docker-compose.yml文件中使用。GITLAB_HOME=/opt/gitlab在
/opt/gitlab目录中创建一个docker-compose.yml文件,并输入以下内容:version: '3.6' services: gitlab: image: gitlab/gitlab-ee:<version>-ee.0 container_name: gitlab restart: always hostname: 'gitlab.example.com' environment: GITLAB_OMNIBUS_CONFIG: | # Add any other gitlab.rb configuration here, each on its own line external_url 'http://gitlab.example.com' gitlab_rails['time_zone'] = 'Asia/Shanghai' ports: - '80:80' - '443:443' - '22:22' volumes: - '${GITLAB_HOME}/config:/etc/gitlab' - '${GITLAB_HOME}/logs:/var/log/gitlab' - '${GITLAB_HOME}/data:/var/opt/gitlab' shm_size: '256m'确保您在与
docker-compose.yml相同的目录下并启动 GitLab:sudo docker compose up -d
提示
如果更改访问端口,需要修改 external_url 和 ports 的值,例如:
external_url "http://gitlab.example.com:8929"

ports:
  - '8929:8929'
查看官网 使用 Docker Compose 安装 Gitlab EE。
极狐Gitlab
使用 Docker Engine 安装 极狐GitLab
external_url根据您的情况配置。sudo docker run --detach \ --hostname gitlab.example.com \ --env GITLAB_OMNIBUS_CONFIG="external_url 'http://gitlab.example.com'; gitlab_rails['time_zone'] = 'Asia/Shanghai'" \ --publish 443:443 --publish 80:80 --publish 22:22 \ --name gitlab \ --restart always \ --volume $GITLAB_HOME/config:/etc/gitlab \ --volume $GITLAB_HOME/logs:/var/log/gitlab \ --volume $GITLAB_HOME/data:/var/opt/gitlab \ --shm-size 256m \ registry.gitlab.cn/omnibus/gitlab-jh:latest使用 Docker Compose 安装 GitLab
在
docker-compose.yml文件中使用环境变量来定义卷的路径。创建.env文件,在.env文件中定义GITLAB_HOME变量,以在docker-compose.yml文件中使用。GITLAB_HOME=/opt/gitlab在
/opt/gitlab目录中创建一个docker-compose.yml文件,并输入以下内容:version: '3.6' services: gitlab: image: 'registry.gitlab.cn/omnibus/gitlab-jh:latest' container_name: gitlab restart: always hostname: 'gitlab.example.com' environment: GITLAB_OMNIBUS_CONFIG: | # Add any other gitlab.rb configuration here, each on its own line external_url 'http://gitlab.example.com' gitlab_rails['time_zone'] = 'Asia/Shanghai' ports: - '80:80' - '443:443' - '22:22' volumes: - '${GITLAB_HOME}/config:/etc/gitlab' - '${GITLAB_HOME}/logs:/var/log/gitlab' - '${GITLAB_HOME}/data:/var/opt/gitlab' shm_size: '256m'确保您在与
docker-compose.yml相同的目录下并启动 极狐GitLab:sudo docker compose up -d
提示
如果更改访问端口,需要修改 external_url 和 ports 的值,例如:
external_url "http://gitlab.example.com:8929"

ports:
  - '8929:8929'
查看官网 使用 Docker Compose 安装 极狐 Gitlab。
查看 gitlab 容器日志
初始化过程可能需要很长时间。您可以通过以下方式跟踪此过程:
sudo docker logs -f gitlab
访问 GitLab
访问 GitLab URL,并使用用户名 root 和来自以下命令的密码登录:
sudo docker exec -it gitlab grep 'Password:' /etc/gitlab/initial_root_password
卸载 Linux 软件包
要卸载 Linux 软件包,您可以选择保留数据(代码库、数据库、配置)或全部删除。
可选。在删除软件包(使用
apt或yum)之前,删除由 Linux 软件包创建的所有用户和群组sudo gitlab-ctl stop && sudo gitlab-ctl remove-accounts如果您在删除账户或组时遇到问题,请手动运行
userdel或groupdel来删除它们。您可能还想从/home/中手动删除剩余的用户主目录。选择是保留您的数据还是删除所有数据
要保留您的数据(代码库、数据库、配置),请停止极狐GitLab 并删除其 supervision 进程
sudo systemctl stop gitlab-runsvdir
sudo systemctl disable gitlab-runsvdir
sudo rm /usr/lib/systemd/system/gitlab-runsvdir.service
sudo systemctl daemon-reload
sudo systemctl reset-failed
sudo gitlab-ctl uninstall
要删除所有数据
sudo gitlab-ctl cleanse && sudo rm -r /opt/gitlab
卸载软件包
Debian/Ubuntu 系统
sudo apt remove gitlab-ee
# 或
sudo apt remove gitlab-jh
RedHat/CentOS 系统
sudo yum remove gitlab-ee
# 或
sudo yum remove gitlab-jh